Note
Rotary jig checks
When a bottle print stretches, doubles or drifts off line, the rotary jig is usually the first place to look. These are the checks we run in the lab every morning.
Why the jig gets blamed last
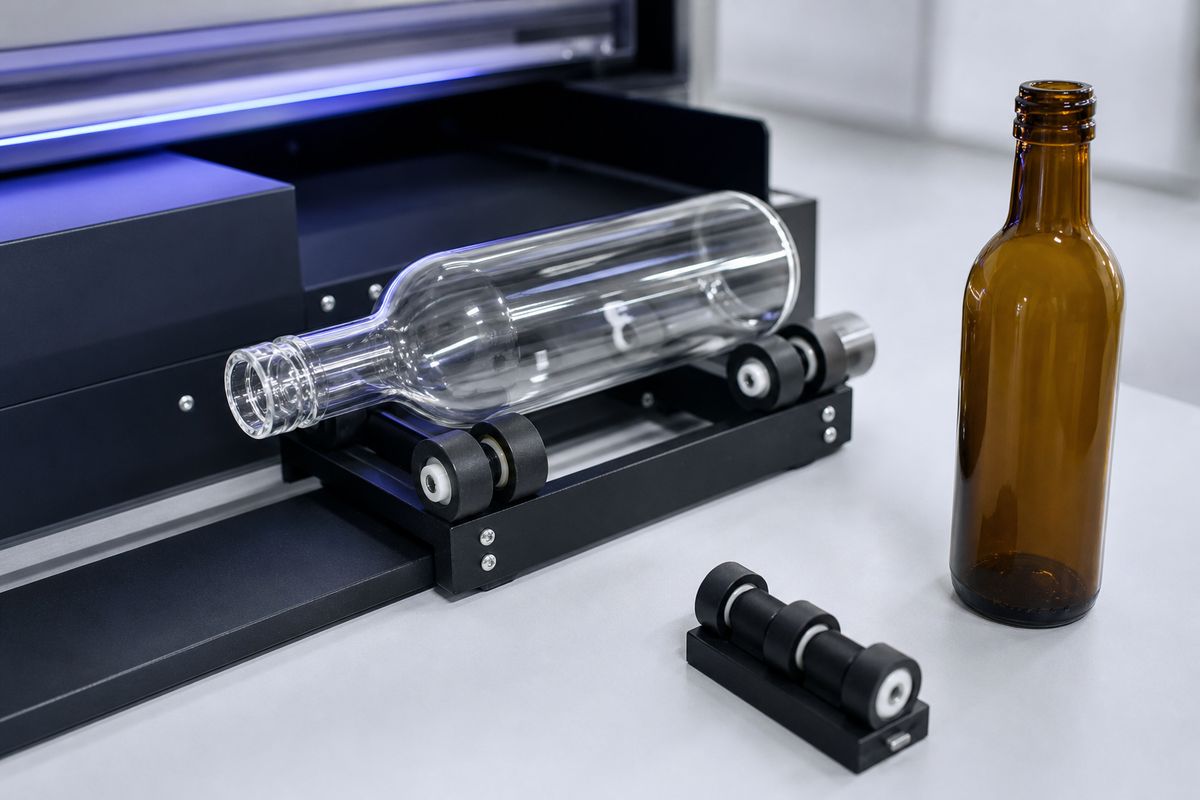
Operators tend to look at the artwork or the ink settings first when a cylinder print goes wrong. In our Sunnyrock lab, most of the faults we trace back actually start at the rotary attachment. A roller with a flat spot, a bottle that is not sitting level, or a diameter value that was left from yesterday's job. The printer does exactly what it is told and the bottle simply does not turn the way the software expects.
The checks below take about five minutes. We do them at the start of every shift and again whenever the bottle shape changes.
Morning checklist
- Wipe the rollers with isopropyl alcohol and check for flat spots or glazing
- Seat a sample bottle and check it sits level along its length
- Confirm the diameter setting matches the bottle you are printing
- Run a short test strip on a scrap bottle before the real run
Rollers and seating
Rubber rollers pick up ink mist, dust and finger grease. Once they glaze, the bottle slips slightly as it turns and the print stretches or shows a seam where the start and end do not meet. Clean them daily and replace them when cleaning no longer brings back the grip. Keep a spare set in the drawer, they are cheap compared to a wasted batch of printed glass.
Tapered bottles and jars need extra care. If one end sits higher than the other the head distance changes along the print, and the far end goes soft. Use the jig's height adjustment or a simple shim so the print surface is parallel to the carriage. Our glass handling note covers how to load glass without scratching it on the rollers.
Diameter and test prints
Measure the bottle at the print area with a vernier, not from the spec sheet. Supplier tolerances on glass and PET can vary by a millimetre or more between batches, and that is enough to stretch the artwork. Print a short line pattern around the bottle and check the join. If the lines overlap or leave a gap, adjust the diameter by small steps until the join is clean. Write the final value on the job card so the next run starts right.
For more on choosing equipment for cylinder work, see our catalogue and the use cases for craft beverage and cosmetics. If your prints still drift after these checks, send photos of the bottle, the jig and a test print through our contact form and we will help troubleshoot.

Talk to BottlePrinter Lab
Contact form · Sunnyrock applications lab